Loading…
← Routes
For returning players
Veteran Route
Ground the early access to dust? Here's what changed — and the shortest path to the World Tree.
0%
0/64 · 8 phases
Veteran Route
0%
Before you start
This route assumes you already know the 1.0 basics. New to Palworld? Start with the beginner route →
Back up your save + purge EA mods
0 of 10 done
Get a restorable save and a fully-vanilla first 1.0 launch. Ten atomic substeps — no “just back it up” hand-waving.
▶ Current objective
0.1Identify your platform and world type
You know exactly which save path and procedure apply to you.
Details
Why The backup path differs by platform (Steam solo/co-op/dedicated, Game Pass) — getting it wrong means backing up the wrong thing.
How to check it's done
- You've identified: Steam solo, co-op, dedicated server, or Game Pass.
0.2Locate the active saveBlocking
The correct save folder is identified — right world, right Player ID, right date.
Details
Why Copying the wrong world or an old Player ID is the most common backup mistake.
Prerequisites
- Platform identified (0.1.1)
How to check it's done
- Correct world, Player ID and last-modified date confirmed before copying anything.
If you're stuck
Several folders look similar
→ Sort by last-modified date and cross-check the Player ID shown in-game.
0.3Make a full external copyBlocking
A dated copy of the save folder exists OUTSIDE the game folder.
Details
Why A copy inside the game folder can be wiped by a verify/reinstall — it must live elsewhere.
Prerequisites
- Save located (0.1.2)
How to check it's done
- A dated copy of the save folder sits outside the game directory.
0.4Back up the configuration tooImportant
Server files, world settings, mod list and key config screenshots are saved.
Details
Why Rebuilding your exact world settings from memory after a fresh start wastes time.
Prerequisites
- External copy made (0.1.3)
How to check it's done
- Server/world config, mod list and setting screenshots are stored with the save copy.
0.5Unsubscribe from all Workshop modsBlocking
No subscription can silently re-download an old mod.
Details
Why A leftover Workshop subscription re-installs mods on next launch — reintroducing exactly what you're purging.
Prerequisites
- Config backed up (0.1.4)
How to check it's done
- Zero active Workshop subscriptions for Palworld.
0.6Delete old mods and loadersBlocking
Mod files and folders are actually removed — not just disabled.
Details
Why Pocketpair states disabling mods is NOT enough for 1.0 — leftover files still break the game.
Prerequisites
- Unsubscribed (0.1.5)
How to check it's done
- Mod files/folders and any loader are physically deleted from disk.
0.7Verify game filesBlocking
Steam has restored any deleted or modified vanilla files.
Details
Why Removing mods can delete or alter vanilla files; verify restores a clean install.
Prerequisites
- Mods deleted (0.1.6)
How to check it's done
- Steam file verification completed with files restored as needed.
0.8Launch Palworld with no modsBlocking
The menu loads cleanly before you open any save.
Details
Why A clean menu load proves the vanilla install works before you risk your save on it.
Prerequisites
- Files verified (0.1.7)
How to check it's done
- The main menu loads with no errors, mods absent.
0.9Test the save for 10 minutesBlocking
Palbox, inventory, fast travel, quests, base and combat all work with no crash.
Details
Why A save that opens but corrupts mid-session is worse than one that fails immediately — smoke-test it.
Prerequisites
- Vanilla launch OK (0.1.8)
How to check it's done
- 10 minutes played: Palbox, inventories, teleport, quests, base and combat all functional.
If you're stuck
The save crashes or misbehaves
→ Restore the external copy (0.1.3) and re-verify files (0.1.7) before retrying.
0.10Make a post-migration backupImportant
A second dated copy exists — your new restore point.
Details
Why Once the save opens correctly in 1.0, that state is worth freezing as a fresh restore point.
Prerequisites
- Save tested OK (0.1.9)
How to check it's done
- Two restorable copies exist and the 1.0 save runs vanilla.
Purge your outdated knowledge
0 of 10 done
Turn the 1.0 changes into concrete decisions about YOUR save — missions, towers, economy, combat.
1.1Open the mission logBlocking
You've noted the actually-active main mission on your save.
Details
Why Main and side missions were reset in 1.0; you must read the real state, not assume the EA one.
How to check it's done
- The active main mission is identified in the journal.
1.2Check already-recognized towersImportant
You know which tower missions are auto-validated on your save.
Details
Why Some tower missions may be auto-validated from bosses you already beat — don't re-clear blindly.
How to check it's done
- Each tower's mission state (recognized or not) is noted.
1.3Audit your level and XPImportant
You understand where you sit against the new level curve.
Details
Why The cap is now 80 and stored EA XP was rescaled to the new table.
How to check it's done
- Current level read against the recommended level of the next fight.
- Level cap
- 65 → 80verified
1.4Audit the tech treeImportant
You've flagged moved/changed recipes before selling any material.
CHECKTech tree recipes (before selling/tossing)Details
Why The tech tree was reordered and recipes changed; tossing a now-needed material wastes hours.
How to check it's done
- Recipes to re-verify are marked; nothing sold before checking.
CHECKTech tree recipes (before selling/tossing)estimate
The tech tree was reordered and several recipes changed in 1.0: re-check a recipe on paldb before parting with a material.
- Tech tree
- reordered, recipes changed — double-check before selling/tossingestimate
1.5Audit your base (work) PalsImportant
Each worker is compared against its new suitability levels.
Details
Why Work Suitabilities now go up to level 10 — some EA workers are outclassed.
How to check it's done
- Every base Pal's new suitability levels are reviewed.
- Work suitability
- lv. 4 → lv. 10verified
1.6Audit your combat PalsImportant
Obsolete EA synergies are removed from your active team.
Details
Why 200+ Partner Skills were reworked; EA meta teams are obsolete.
How to check it's done
- Team no longer relies on reworked/dead EA synergies.
- Passives
- largely rewritten (soak-freeze chains, anti-boss poison) — EA meta teams are obsoleteestimate
1.7Audit storage and transportOptimization
You're using the new filters, chest names, auto-deposit and improved transport.
Details
Why 1.0 added logistics quality-of-life that saves real time every session.
How to check it's done
- New storage/transport features are set up at your base.
1.8Audit weapons and armorImportant
Gear is repaired and its tiers/resistances re-checked after rebalancing.
Details
Why Durability, tech tiers and heat/cold resistances were rebalanced.
How to check it's done
- Weapons/armor repaired; heat and cold resistance verified.
1.9Classify your old habitsOptimization
Each habit is tagged KEEP / STOP / CHECK / SKIP with a concrete reason.
Details
Why Naming which reflexes to drop is what makes the route faster than raw play.
How to check it's done
- Old habits are each tagged with a decision.
- Farming 12
 Cattiva
 - dead strategy — diversify speciesverified
- Side missions
- optional — only if on your path or profitableestimate
1.10Choose your route profileBlocking
Absolute rush, balanced rush or full rediscovery is selected.
Details
Why This choice decides which substeps the diagnostic hides for you.
How to check it's done
- A profile is selected in the route diagnostic.
Recalibrate your XP loop
0 of 10 done
Build an XP loop that feeds the NEXT boss instead of farming at random. Stop at 5 catches per species — the 1.0 bonus is done.
2.1Set the next level thresholdBlocking
You know the recommended level of the next fight and your exact gap.
Details
Why Leveling with a target stops you over-grinding past what the next boss needs.
How to check it's done
- Next fight's recommended level and your gap are displayed.
2.2Scan incomplete capture bonusesImportant
Nearby species at 0–4 catches are listed; 5/5 ones hidden.
Details
Why The capture bonus caps at 5 per species — only unfinished species are worth XP.
How to check it's done
- A list of nearby 0–4/5 species is available.
- Capture bonus
- 12 → 5 catches per speciesverified
2.3Prep enough spheresImportant
You carry enough spheres to finish several species without a base round-trip.
Details
Why Running out mid-loop forces a base trip that kills the loop's efficiency.
How to check it's done
- Sphere reserve covers the planned species.
2.4Build a geographic loopOptimization
Species, Alphas, watchtowers and fast travels on the way to the next objective are grouped.
Details
Why Chaining catches along the route beats teleporting back and forth.
How to check it's done
- A loop route toward the next objective is planned.
2.5Complete one species to 5Blocking
You stop at exactly 5 catches — the 1.0 bonus is then done.
STOPSingle-species farming (e.g. 12Cattiva)Details
Why Past 5, XP/minute collapses for that species.
How to check it's done
- One species reached 5/5, then you moved on.
STOPSingle-species farming (e.g. 12
Cattiva)verifiedThe capture bonus caps at 5 catches per species in 1.0: past that, XP/minute collapses. Stop at 5, switch species.
Pays off: Diversifying captures = better XP
Capture bonus12 → 5 catches/speciesverified
2.6Switch speciesBlocking
You move to the next nearest still-profitable species.
Details
Why Diversifying species is the whole 1.0 XP mechanic.
How to check it's done
- A new 0–4/5 species is now the target.
2.7Prioritize catches on the wayImportant
New species and Alphas are caught when sphere cost and risk stay acceptable.
Details
Why Catching Alphas pays far more than killing them.
How to check it's done
- On-route Alphas/species caught where worthwhile.
- Alpha Pals
- CATCHING pays far more than killingestimate
- Alpha respawn
- 15 min (~)estimate
2.8Add profitable exploration/dungeonsOptimization
Only dungeons/ruins near the main route are used.
Details
Why Detours far off-route cost more time than the XP they give.
How to check it's done
- Only on-route dungeons/ruins were run.
2.9Use catch-up itemsOptional
Training Manuals / raid rewards are treated as an optional branch.
KEEP Bellanoir raid loot
Details
Why Catch-up items help but must never become a hidden prerequisite.
KEEP
Bellanoir raid lootestimateExclusive Training Crystals, IV/Stat Fruits (Power/Life/Stout) for perfect-stat breeding, Ultra Slabs, boss eggs.
Pays off: Level catch-up + perfect-stat breeding
- Catch-up (optional, off the critical path)
- Training Manuals (sanctuaries/dungeons) and Training Crystals (Bellanoir raid, exclusive)estimate
2.10Stop at the next fight's thresholdBlocking
Once level, weapon and team are enough, XP farming leaves the route.
Details
Why The route should never keep you grinding past what the next fight requires.
How to check it's done
- Target level reached without over-catching; XP farm removed from the route.
Sync & clear the 6 Palpagos towers
0 of 10 done
Get mission progress and the first six Key Spheres WITHOUT redoing content your save already recognizes.
Tower boss timer5 minverifiedAncient Technology Points on first clear5 pts/towerverified
- View on map
3.1Audit the log, map and tower colorsBlocking
You know which tower missions are auto-validated and which Key Spheres you truly hold.
Details
Why Some clears are recognized from your EA save — redoing them all wastes an hour.
How to check it's done
- Auto-validated missions, already-cleared towers and Key Spheres cross-checked.
- Suggested order (1.0 levels)
- Zoe &
 Grizzbolt 10 → Lily &
  Lyleen 20 → Axel &
  Orserk 30 → Marcus &
  Faleris 40 → Victor &
  Shadowbeak 50 → Saya &
  Selyne 55datamined
 - HP of the 6 bosses (normal)
- 12,900 → 234,900datamined
3.2Prep a single tourImportant
Gear repaired, ammo full, a fast mount out — no six base round-trips.
Details
Why With the 5-minute timer, travel is the real cost — one clean loop beats six resupply trips.
How to check it's done
- Gear/ammo topped up and a fast mount is ready before the first tower.
- Bonus along the way
- every cleared tower entrance becomes a permanent fast travelestimate
- View on map
3.3Zoe &
GrizzboltConditionalTower done or confirmed already-recognized — Ground counter ready.
Details
Why Only fight it if the tower/mission isn't already validated on your save.
How to check it's done
- Tower cleared or its Key Sphere already held.
- Zoe & Grizzbolt
- lv. 10 · 113,-431 · Electric → Groundestimate
- View on map
3.4Lily &
LyleenConditionalTower done or confirmed recognized — Fire counter ready.
Details
Why Only if not already validated.
How to check it's done
- Tower cleared or Key Sphere already held.
- Lily & Lyleen
- lv. 20 · 181,29 · Grass → Fireestimate
- View on map
3.5Axel &
OrserkConditionalTower done or confirmed recognized — Ice/Ground counter ready.
Details
Why Only if not already validated.
How to check it's done
- Tower cleared or Key Sphere already held.
- Axel & Orserk
- lv. 30 · -587,-517 · Electric/Dragon → Ice/Groundestimate
- View on map
3.6Marcus &
FalerisConditionalTower done or confirmed recognized — Water counter ready.
Details
Why Only if not already validated.
How to check it's done
- Tower cleared or Key Sphere already held.
- Marcus & Faleris
- lv. 40 · 556,336 · Fire → Waterestimate
- View on map
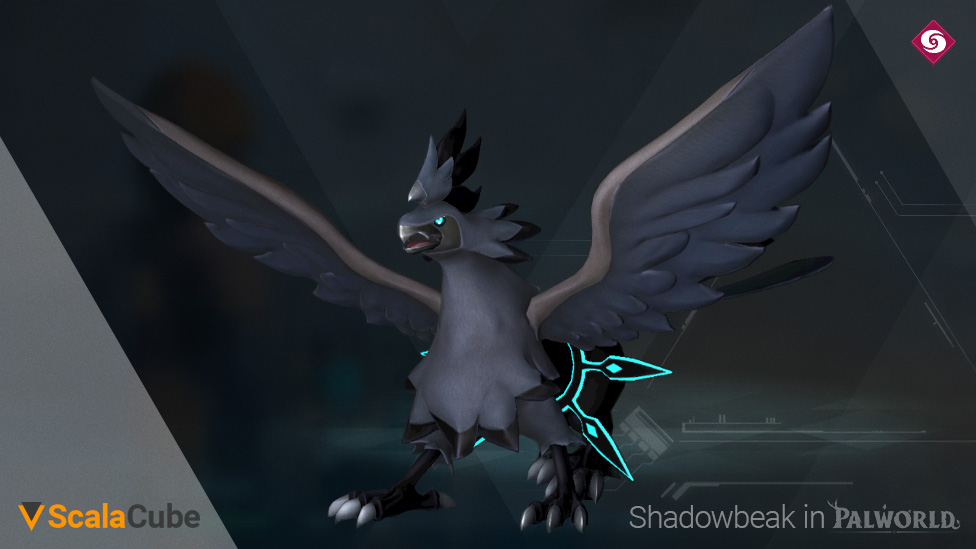
3.7Victor &
ShadowbeakConditionalTower done or confirmed recognized — Dragon counter ready.
Details
Why Only if not already validated.
How to check it's done
- Tower cleared or Key Sphere already held.
- Victor & Shadowbeak
- lv. 50 · -148,447 · Dark → Dragonestimate
- View on map
3.8Saya &
SelyneConditionalTower done or confirmed recognized — Dragon counter, mind the new 1.0 patterns.
Details
Why Only if not already validated; check the reworked 1.0 attack patterns.
How to check it's done
- Tower cleared or Key Sphere already held.
- Saya & Selyne
- lv. 55 · -597,206 · Dark → Dragonestimate
3.9Re-sync the log after the tourBlocking
Every clear is recognized by the main mission.
Details
Why A clear that the mission doesn't register can block the
 Panthalus chain later.
How to check it's done
- Journal/NPCs re-checked so each clear is registered.
3.10Validate the first six Key SpheresBlocking
The counter reads 6/8 before heading to Feybreak.
KEEPAncient Technology PointsDetails
Why All 8 towers are the hard prerequisite for the
Panthalus chain — none can be skipped.How to check it's done
- Key Sphere counter shows 6/8.
KEEPAncient Technology Pointsdatamined
The budget is tight all the way to endgame: don't blow them early.
Pays off: Triple Jump Boots, Soralite Quarry, Ancient Hatchery, Wing Pack
Triple Jump Boots (lv. 70)6 ptsdataminedSoralite Quarry (~lv. 72)7 ptsdataminedAncient Hatchery (~lv. 76)8 ptsdataminedWing Pack (lv. 80)9 ptsdatamined
- Validation
- all 8 towers beaten gate the Panthalus chain — none skippableestimate
Feybreak Tower
0 of 10 done
Reach, beat and validate Bjorn & Bastigor — the DPS wall that unlocks the Sunreach portal. Ten atomic substeps.
Bjorn &  Bastigor60 lv.dataminedHP310000 HPdataminedTypeIce → counter with Firedatamined
4.1Verify the 6 Palpagos towers are loggedBlocking
The mission recognizes all six Palpagos Key Spheres before you commit to Feybreak.
Details
Why Feybreak is tower 7/8; if a Palpagos clear didn't register, you'll waste the trip and still be gated later.
Prerequisites
- Macro 1.1 done — 6/8 Key Spheres validated
How to check it's done
- Key Sphere counter reads 6/8 and no Palpagos tower mission is still open.
4.2Gear cold resistanceImportant
Your armor covers the Feybreak cold so environment damage doesn't stack on the fight.
Details
Why Feybreak sits in a cold zone — fighting an Ice duo while freezing wastes heals you need for the DPS check.
Prerequisites
- 6 towers verified (1.2.1)
How to check it's done
- Cold-resistant armor equipped; no cold status ticking on approach.
- View on map
4.3Plan the approachOptimization
You have a fast route to the tower base and a mount that survives the climb.
Details
Why The tower is far off the Palpagos loop; a planned approach beats dying to trash mobs on the way.
Prerequisites
- Cold resistance ready (1.2.2)
How to check it's done
- A mount and route to the Feybreak Tower base are set.
- Coordinates
- -1294 / -1669estimate
- View on map
4.4Unlock the tower's fast travelImportant
The Feybreak Tower Entrance fast travel is unlocked — a permanent shortcut back.
Details
Why Reaching the entrance registers the fast travel; if you wipe, you respawn one step away instead of re-crossing the zone.
Prerequisites
- Approach planned (1.2.3)
How to check it's done
- The tower-entrance fast travel point is unlocked on the map.
4.5Build the Fire teamBlocking
Your active party answers the Ice duo with Fire damage.
Details
Why Bjorn &
Bastigor are Ice; Fire is the type answer and turns the wall into a manageable fight.Prerequisites
- Fast travel unlocked (1.2.4)
How to check it's done
- Active party leans Fire; passives that boost Fire or anti-boss damage are slotted.
4.6Craft the pre-Sunreach DPS tierImportant
You carry the Charge Rifle (or an equivalent tier) — enough burst for a 310k HP wall.
Charge RifleDetails
Why This is a DPS check, not a mechanics check; the Charge Rifle is the big damage tier available before Sunreach.
Prerequisites
- Fire team ready (1.2.5)
How to check it's done
- Charge Rifle crafted and equipped, or a weapon of equivalent tier.
- Pre-Sunreach arsenal tier
- Charge Rifle — tech 65, 200 Coralum Ingot + 25 Bio Battery + 5 Thermal Core + 15 Computerdatamined
4.7Repair and double your reserveImportant
Gear repaired, ammo and heals doubled — the fight won't stall on supply.
Details
Why A 310k-HP wall burns through ammo and heals; running dry mid-fight forces a restart.
Prerequisites
- DPS tier ready (1.2.6)
How to check it's done
- Weapons/armor at full durability; ammo and heals stocked for a long fight.
- View on map
4.8Defeat Bjorn &
BastigorBlockingThe Feybreak duo is down.
KEEPAncient Technology PointsDetails
Why This clear is the hard gate to Sunreach — there's no other way up.
Prerequisites
- Reserve doubled (1.2.7)
How to check it's done
- Bjorn & Bastigor defeated; the clear registers in the log.
If you're stuck
You run out of DPS before the timer
→ Fall back to 1.2.6 for a higher weapon tier and 1.2.5 for a stronger Fire team, then retry.
KEEPAncient Technology Pointsdatamined
The budget is tight all the way to endgame: don't blow them early.
Pays off: Triple Jump Boots, Soralite Quarry, Ancient Hatchery, Wing Pack
Triple Jump Boots (lv. 70)6 ptsdataminedSoralite Quarry (~lv. 72)7 ptsdataminedAncient Hatchery (~lv. 76)8 ptsdataminedWing Pack (lv. 80)9 ptsdatamined
- Bjorn & Bastigor
- 60 lv.datamined
- HP
- 310000 HPdatamined
4.9Validate Key Sphere 7/8 and re-syncBlocking
The counter reads 7/8 and the main mission recognizes the Feybreak clear.
Details
Why An unregistered clear can block the
Panthalus chain later — confirm the sphere and the mission both moved.Prerequisites
- Feybreak defeated (1.2.8)
How to check it's done
- Key Sphere counter shows 7/8; the tower mission is closed in the journal.
- View on map
4.10Climb to the summitBlocking
You reach the top of the tower, where the Sunreach altar sits.
Details
Why The Sunreach portal is at the tower summit — reaching it is the handoff into macro 2.1.
Prerequisites
- Key Sphere 7/8 validated (1.2.9)
How to check it's done
- You're at the tower summit, Sunreach altar in view.
Sunreach
0 of 4 done
The sky islands: defense modules, first endgame boss, first endgame ore.
- View on map
5.1Activate the Sunreach portal
Portal taken at the top of the Feybreak Tower.
Details
After beating Bjorn &
Bastigor, an altar appears at the top of the tower: it is the ONLY way into Sunreach — you cannot fly there from the surface. Arrive geared: sky-island spawns start at level 60.- Sunreach access
- altar at the top of the Feybreak Tower — sole entrance, no flying upestimate
- Spawn levels
- 60+ everywhere; recommended level 68–70estimate
- Traversal without a flying mount
- purple teleport orbs floating between the islandsestimate
5.2Disable the 6 defense modules
All 6 modules disabled — the whirlwind above the central tower is gone.
Details
A whirlwind shields the central tower while the 6 modules are active. Spotting them is easy: each module projects a light beam visible from afar — fly (or hop purple orb to purple orb) from beam to beam and interact with each module.
- Defense modules
- 6 modulesestimate
- Spotting
- each module is marked by a light beamestimate
- Multiplayer
- EVERY player has to disable the modules for themselvesestimate
- Validation
- the whirlwind shielding the central tower disappearsestimate
5.3Boss: Auri &
 Shaolong
Auri &
Shaolong defeated. FrostallionOrserk
Details
A Dragon/Water duo: Ice and Electric cover their classic weaknesses — the Electric team you're prepping for
Panthalus already works here. Aim for the BLUE parts of the body: the fur takes no damage.- Auri & Shaolong
- 68 lv.datamined
- HP
- 327600 HPdatamined
- Type
- Dragon / Waterdatamined
- Weak point
- the blue parts of the body — the fur takes zero damageestimate
- Phase 2
- the arena floods and Celestial Vortex pulls you toward the center — shelter behind a pillar or race outward on a fast mount; a flying mount trivializes most water attacksestimate
- Recommended counters
- Frostallion (Ice) · Orserk (Electric)estimate
- Reward
- +5 Ancient Technology Pointsestimate
- Story checkpoint
- the win triggers the “The Sunreacher” mission — talk to Auri again to continuedatamined
- Auri &
- View on map
5.4Start the Soralite farm
Soralite spot identified and farming started.
Plasma MulticutterMechanical BowCHECKTech tree recipes (before selling/tossing)KEEPSoraliteDetails
Check your tech tree early: if paldb is right (tech 54, conflicting with the guides that say 66 — U-11), you can craft the Multicutter well before Sunreach and mine on arrival. First big Soralite payoff: the Mechanical Bow (tech 67).
CHECKTech tree recipes (before selling/tossing)estimate
The tech tree was reordered and several recipes changed in 1.0: re-check a recipe on paldb before parting with a material.
KEEPSoraliteestimate
Sunreach's endgame ore, smelted at the Ancient Furnace only.
Pays off: Endgame crafts (Ancient Furnace)
- Multicutter unlock (guides)
- 66 lv.estimate
- Multicutter unlock (paldb)
- 54 Technologydatamined
- Multicutter craft
- 50 Pal Metal Ingot + 50 Plasteel + 30 Bio Battery + 10 Computer + 10 Cryogenic Coolantdatamined
- First Soralite payoff
- Mechanical Bow — tech 67, 40 Soralite Ingot + 20 Carbon Fiber + 200 Paldium Fragment + 3 AI Coredatamined
Panthalus chain
0 of 5 done
Unlocking the World Tree terminal runs through catching Panthalus. The whole chain is sourced from nexttier.pro (estimate).
- View on map
6.1Talk to the Ancient Civilization Researcher
“
Panthalus” mission started: the 4 Echobones are marked on your map and you hold the Faded Schematic.Deserted IsletFaded SchematicDetails
Prerequisite: all 8 tower bosses beaten, then TALK TO AURI AGAIN after her defeat — the main mission chain (The Sunreacher → The Calamity) sends you to the Researcher. He's on the Deserted Islet, west of the No Man's Trail fast travel. Talking to him starts the mission, drops the 4 Echobone markers on the map and hands over the Faded Schematic needed for the flute.
- Prerequisite
- all 8 tower bosses beaten, then talk to Auri again — she points you to the Researcherestimate
- Mission chain
- The Sunreacher → The Calamity → Panthalusdatamined
- Researcher's position
- Deserted Islet, west of the No Man's Trail fast travelestimate
- Validation
- the 4 Echobone markers appear on the map + Faded Schematic in inventoryestimate
game8.co — How to Get Panthalus · The Nerd Stash — Echobones & Panthalus
6.2Collect the 4 Echobones
All 4 Echobones in inventory — the 4 map markers are cleared.
Marine EchoboneSilent EchoboneSeafoam EchoboneTidewind EchoboneDetails
Four giant whale skeletons, one per corner of the map: chain them by fast travel with a flying mount out. At each site, the Echobone is a glowing pillar to examine on or INSIDE the skull. Any order works — the one below minimizes armor swaps (temperate → heat → cold).
- Echobones required
- 4estimate
- 1 · Marine Echobone
- 124, -524 — west of Windswept Hills (Grassy Behemoth Hills FT): climb or fly ONTO the whale's skullestimate
- 2 · Silent Echobone
- 356, -111 — short trip from the Altar of the Windcaller FT: a lv. 55
 Jormuntide patrols the coast (passive, avoidable)estimate
 - 3 · Seafoam Echobone
- -515, -545 — Mount Obsidian, near the Eternal Pyre Tower Entrance: step INSIDE the skull; heat armorestimate
- 4 · Tidewind Echobone
- -265, 483 — Astral Mountains, west of the Land of Absolute Zero FT: drop toward the frozen lake below, pillar at the base of the skull; cold armorestimate
- Validation
- each marker clears on pickup — 4/4 in inventoryestimate
The Nerd Stash — Echobones & Panthalus · Insider Gaming — Echobone locations
6.3Craft the Echoing Flute
Echoing Flute in inventory.
Echoing FluteDetails
Any workbench does the job — even a Primitive Workbench dropped at a temp camp. If the recipe doesn't show in the craft list, you're missing the Researcher's Faded Schematic: go back and see him.
- Recipe
- 4 Echobones + Faded Schematic (handed over by the Researcher)estimate
- Workbench
- any — Primitive Workbench includedestimate
- View on map
6.4Summon and CATCH
PanthalusPanthalus caught — not killed. Beakon
 Helzephyr LuxRing of Mercy
Details
Return to the Deserted Islet with the flute and examine the glowing blue stone next to the Researcher:
Panthalus emerges. DO NOT KILL IT: if it dies, the WHOLE summoning ritual has to be redone. The fight is scripted to bring it to a sliver of HP where any sphere is a guaranteed catch — the Ring of Mercy (damage never drops below 1 HP) removes the risk. After the catch, TALK TO THE RESEARCHER AGAIN to complete the mission. Prep your Electric BEFORE the chain — Beakon is catchable as early as the desert, Helzephyr Lux hits harder but spawns later.- Panthalus
- 70 lv.datamined
- HP
- 353220 HPdatamined
- Capture rate (boss)
- ×0.7datamined
- Type
- Water — weak to Electricestimate
- Fight timer
- 10 minestimate
- Summoning
- glowing blue stone next to the Researcher, Echoing Flute in your bagestimate
- Weak point
- the forehead gem (thenerdstash) — game8 says “the body”: settle in-gameestimate
- Capture
- fight scripted down to a sliver of HP → any sphere is guaranteed; if it DIES, the whole ritual restartsestimate
- Mission rewards
- 63,882 XP + Applied Watering Handbook Idatamined
- Boss drops
- Diamond ×1 (100%) · Giant Pal Soul ×1 (100%)datamined
- +5 Ancient Technology Points
- claimed by nexttier — absent from paldb data: confirm in-gameestimate
- Validation
- talk to the Researcher again after the catch — HE closes the missionestimate
- Where to get Beakon
- desert lv. 34–38; Palpagos (95,23) lv. 37datamined
- Where to get Helzephyr Lux
- Cherry Blossom Cave 51–52; Sakurajima 47–48datamined
paldb.cc (référence la plus à jour) · The Nerd Stash — Echobones & Panthalus · game8.co — Panthalus Walkthrough
- View on map
6.5Activate the World Tree terminal
Terminal activated — the World Tree barrier is down.
Details
The terminal sits at the foot of the energy barrier sealing the World Tree. Confirmed conditions:
Panthalus caught and the “To the World Tree” mission active. If the barrier won't drop, put Panthalus in your ACTIVE party and retry (required per two guides, unconfirmed by paldb data). Once activated, the barrier falls for good — you don't need Panthalus afterward.- Confirmed conditions
- Panthalus caught + “To the World Tree” mission activedatamined
- Active party
- requirement reported by nexttier and The Big Lead, absent from paldb data — troubleshooting: put Panthalus in your active party and retryestimate
- Location
- terminal in front of the World Tree's energy barrierestimate
- Validation
- the barrier disappears FOR GOOD — the region stays openestimate
World Tree and Sealed Calamity
0 of 5 done
A radiation biome, resources that evaporate, three guardians, an 8-key door — then the final boss.
- View on map
7.1First incursion: 30 Paloxite without the mask
30 Paloxite in inventory — and you got out alive.
PaloxiteKEEPWorld Tree Holy WaterKEEPPaloxite + Mythical WoodDetails
The World Tree paradox: the Gas Mask costs 30 Paloxite… which is harvested inside the World Tree. The answer is a LIGHTNING raid without the mask: fast mount, full heals, light inventory, straight line to the first deposit, 30 Paloxite, turn around. Grab Holy Water if it drops on the way.
KEEPWorld Tree Holy Waterestimate
Keeps World Tree resources from vanishing AND doubles as a craft input — save it with a rainbow-passive Pal.
Pays off: World Tree farming + craft inputs
KEEPPaloxite + Mythical Woodestimate
Key inputs of the Ancient Relic Recycler, harvested in the World Tree.
Pays off: Ancient Relic Recycler
- Story checkpoint
- entering the World Tree triggers the “Sin” missiondatamined
- Without the mask
- continuous HP loss in the irradiated zone — keep the raid shortestimate
- Harvest target
- exactly 30 Paloxite (the mask's cost)datamined
- Untested alternative
- a lv. 5 “rainbow”-passive Pal would negate the radiation — verify in-gameestimate
- Validation
- 30 Paloxite in inventory, player alive outsideestimate
- View on map
7.2Craft the Gas Mask, then farm in sequence
Gas Mask equipped — the World Tree is sustainably farmable.
Gas MaskWorld Tree Holy WaterKEEPRadiant GemsKEEPAncient Relics (Glistening/Decayed)Details
Craft at the Ancient Workbench, then harvest in the useful order. Holy Water reflex: drink it BEFORE approaching a deposit, not after — its aura keeps resources from vanishing.
KEEPRadiant Gemsestimate
The core of the Awakening mechanic — farmed in the depths of the World Tree.
Pays off: Awakening
KEEPAncient Relics (Glistening/Decayed)datamined
Never toss one: feedstock for the Ancient Relic Recycler to roll legendary passives.
Pays off: Legendary passives (God of Destruction, Dimensional Leap…)
Ancient Relic Recycler unlock74 lv.datamined
- Gas Mask craft
- Technology 76 — 10 Toxin Filtering Membrane + 30 Paloxite + 168,000 gold (Ancient Workbench)datamined
- World Tree Holy Water
- aura against resource vanishing — ~30 s duration, measure in-gameestimate
- Getting Holy Water
- drops from lv. 70 World Tree Pals (1–3 at 50%); chests: 5–10 (100%)datamined
- Sequenced harvest
- 2nd incursion: Mythical Wood + first Radiant Gems · endgame: Ancient Relics + Awakening/weapon stockestimate
- View on map
7.3Defeat the 3 guardians
All three guardians are down.
Details
Two Grass(/Dark) guardians and one Electric: Fire clears both Roots, Ground answers the modified
Grizzbolt. To find them: read the JOURNAL near the second barrier — it drops the three quest markers on your map.- Story checkpoint
- the World Tree Guardian's dialogue starts the “The Sealed Calamity” missiondatamined
- Spotting
- the journal near the second barrier places the 3 quest markersestimate
- 1/3 ·
 Dandilord
 - Rotmist Root — Grass/Dark lv. 78 → counter with Firedatamined
- 2/3 ·
 Silvance
 - Shinespore Root — Grass lv. 78 → counter with Firedatamined
- 3/3 · Highly Modified Grizzbolt
- Forbidden Laboratory — Electric lv. 78 → counter with Grounddatamined
- Validation
- all three down → the second barrier becomes passableestimate
7.4Open the 8 Key Spheres door
The door is open — the 8 Key Spheres were already in your inventory.
Details
No farming here: every tower boss you beat handed you its Key Sphere automatically. If you followed the route (6 Palpagos towers + Feybreak + Sunreach), you already hold all 8 — the door is just a checkpoint. If one is missing, a tower wasn't re-cleared.
- Key Spheres required
- 8estimate
- Source
- one Key Sphere per faction tower boss — granted automatically on clear, nothing to huntestimate
- Checklist of 8
- Zoe & Grizzbolt · Lily & Lyleen · Axel & Orserk · Marcus & Faleris · Victor & Shadowbeak · Saya & Selyne · Bjorn & Bastigor · Auri & Shaolong — if one is missing, re-clear that tower (step 1)estimate
7.5The Sealed Calamity — Zenara &
 Astralym
Final boss down, “Awakening” mission complete. GG.
Details
Typeless, so no elemental shortcut: it's a pure DPS and survival check. Pre-fight review: endgame armor and shield REPAIRED, primary + secondary weapon, plenty of ammo, attack/defense food, heals, final team, light inventory. (paldb spelling: “Zenara”; some guides write “Zanara”.)
- Story checkpoint
- the “Awakening” mission activates as you approach the duo — completing it ends the storydatamined
- Zenara & Astralym
- lv. 80 duodatamined
- Prep review
- armor + shield repaired · 2 weapons · ammo · attack/defense food · heals · final team · light inventoryestimate
- HP
- 420000 HPdatamined
- Location
- the tall tower at the WESTERN corner of the zone (~-838, 689)estimate
- Type
- TYPELESS — no exploitable weaknessestimate
- Hard mode (post-rush)
- lv. 100 — 6,237,000 HPdatamined